Fit a harness
Submitted by - Mike Kelly
Disclaimer
This article is intended as a helpful guide and shows how I fitted a Harness. If you are in any doubt, or not qualified, do not undertake this work, consult a qualified mechanic. The author or the GT4 Drivers Club can not be held responsible for any loss or damage resulting from use of this article.
Why fit a harness?
In my opinion one of the weak points of the ST205 is the front seats. I find that they are not particularly supportive especially on the track, where under heavy cornering, it can give the impression that the car is suffering from body roll, in reality it is you moving around in the seat. As a partial solution to this I decided to install some harnesses which would stop some of the body movement.
What harness to choose?
When choosing the particular harness I wanted to keep the ability to use the stock seatbelts, as harnesses do not allow you to lean forward in your seat - not a problem on the track, but could be dangerous on the road at junctions etc. Another criteria for the harness was that I retain the use of the rear passenger seats.
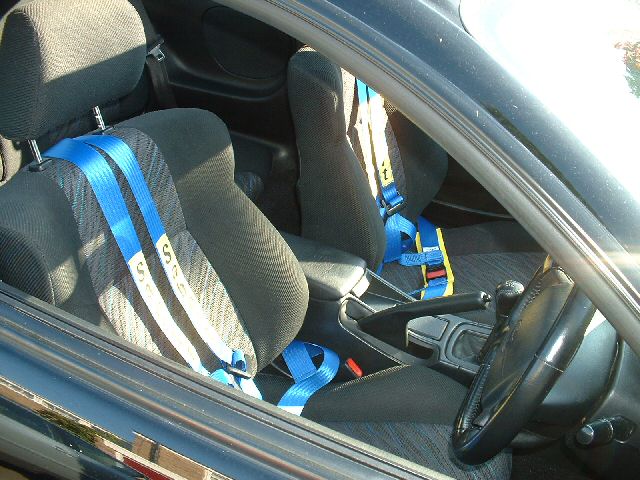
I decided to go for a Sabelt 3-Point harness which I purchased from Demon Tweeks the price was £46.31 (part number 902059) I bought two harnesses as the price to me was reasonable and I think it will greatly enhance the experience for passengers out on track. I went for blue harnesses but black and red are also available. The particular benefit of this harness is that the rear section is detachable by means of a seatbelt type buckle this allows the harnesses to be 'dismantled' when not in use, giving access to the rear seats.
Tools
A basic selection of tools should suffice, a torque wrench and adjustable spanner are essential.
The Install
I decided to tackle the rear section of the harness first, in accordance with the manufacturers instructions the existing seatbelt mounts are the preferred fixings for the harnesses I chose to use the clip mount from the rear seatbelts as removal of the rear seats is a relatively simple task. The harness comes supplied with bolts - remove the existing bolt and replace with the bolt supplied with the harness - passing this bolt through the seatbelt clip, then torque to the prescribed value.
When not in use the rear section of the harness lays flat underneath the rear seat bench, the rear seat is foam construction on the bottom so no chafing occurs. The standard seatbelt clip passes through the bench for normal use.
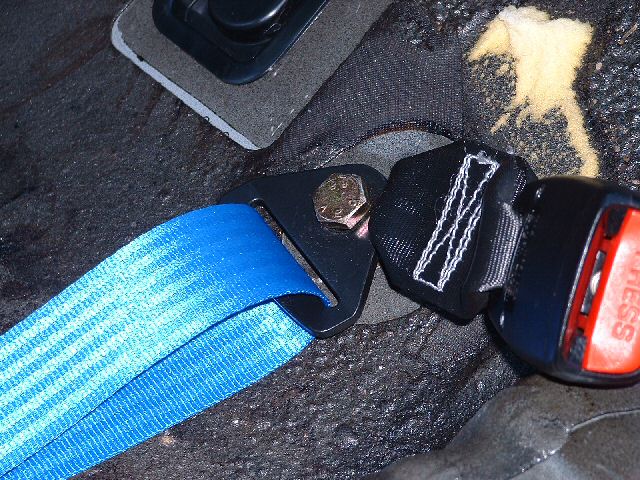
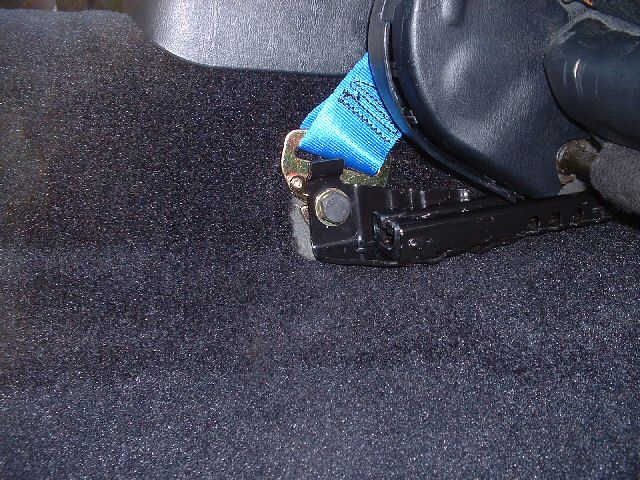
The front section of the harness posed more difficulties. The front section uses eyebolts and clips for easy removal / installation of the harness, I chose to use the forward bolt of the seatbelt rail for the eyebolt on the 'outside' of the harness (outside meaning the section of the harness nearest the door). A problem arises because the supplied one inch eyebolt is not long enough due to the thickness of the carpet and a washer. This was easily solved with a longer 37 mm eyebolt from Grand Prix Racewear. Demon Tweeks have two inch eyebolts but these may be too long. The new longer eyebolt fits perfectly and also allows the seatbelt rail to be secure.
<a name="anchor"></a>
The third and final mounting point for the harness creates the most difficulties, for which there does not appear to be an ideal solution. The standard seatbelt is mounted on the seat, when the supplied eyebolt is installed in this position it creates two problems. Firstly the eyebolt is too large to allow the seat mechanism dust cover to be replaced, as the mechanism is lubricated this would rapidly clog up and would require very regular cleaning. Secondly and more drastic, the eyebolt fouls on the transmission tunnel when the seat is installed, this prevents the seat from being moved forwards and back, a particular problem for the passenger seat.
I thought that this could be solved by utilizing one of the seat mount points and installing an eyebolt in place of the existing bolt however both the size and thread of the seat mount bolts is different, seat belts always use a 7/16 bolt whereas the seat mounts use a 10 mm bolt. This did not seem to be a large problem - I simply had to find a 10 mm eyebolt of similar design to the supplied ones, this search proved to be in vain after looking in B&Q, Halfords, the other usual suspects and numerous specialist fixing suppliers, I found nothing that even came close to being suitable.
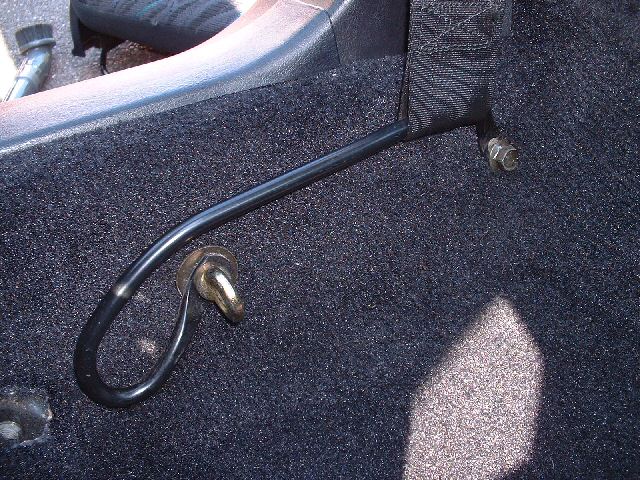
In discussion with a friend from the GT4DC - Don Boyack, he suggested I do the same as he had done and pass a longer 10 mm bolt through the seat mount and through the clip on the harness into the standard bolt hole. Not a pretty solution, but for the present I am unable to find anything better. This also means that the harnesses are permanently attached to the car and cannot be removed without removing the seat. I keep the harnesses in the supplied thick plastic bags and tuck them under the seats. I intend to rectify this in the near future by having a eyebolt mounting plate welded in place for the harness to clip into, this will be safer and allow me to remove the harnesses when not in use.
Summary
The harnesses take approximately two minutes to get ready for adjustment by the user, providing the rear seats have already been removed (ten minutes). Aside from the problems with the final mounting point I am very pleased with the harnesses, and for the price they represent great value. No other modification has had a greater impact on the car as these, the driving experience has increased phenomenally. The finished setup also looks the part.
Update
I have finally got round to having some harness points welded into place to solve the problem mentioned.
Not trusting my own skills with a welder for such a critical component I decided to enlist the skills of Datajon down in Salisbury.
I chose to have some plates welded onto the car just rearwards of the previously used seat mount. Mounts were welded onto both sides of the transmission tunnel although I have only show the pictures for the passenger side.
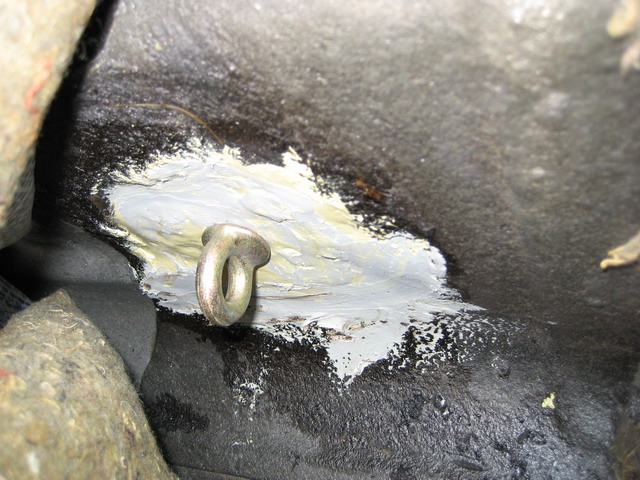
The area was prepared by pulling the carpet right forward out of the way and scraping off the tar-like sound proofing from the area. On the outside of the car the rear section of the propshaft had to be removed then the area was cleaned of sealant and sanded to give a clean metal surface for welding onto. Five holes were drilled for each fixing point either side. A large centre hole for the eyebolt to pass through and 4 smaller holes for plug welds.
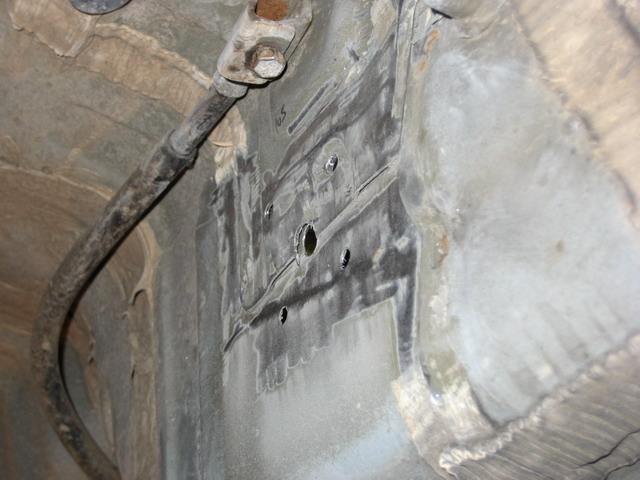
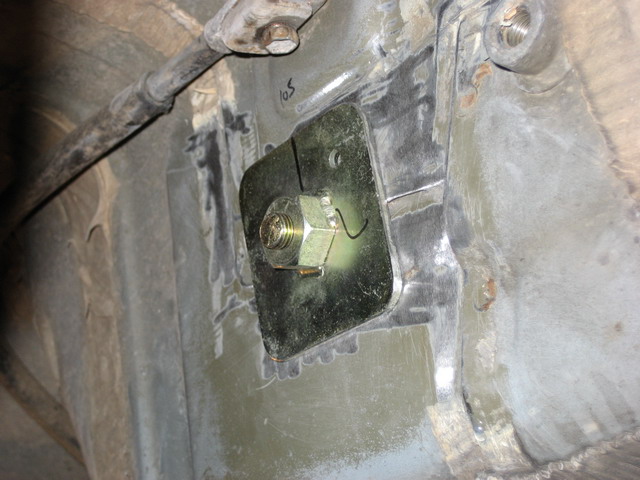
The plate and eyebolt were then fixed into position and MIG welded on the outside. Once this had cooled the four plug welds were TIG welded from the inside of the car. I was very impressed with the neatness of the welding it looks very robust.
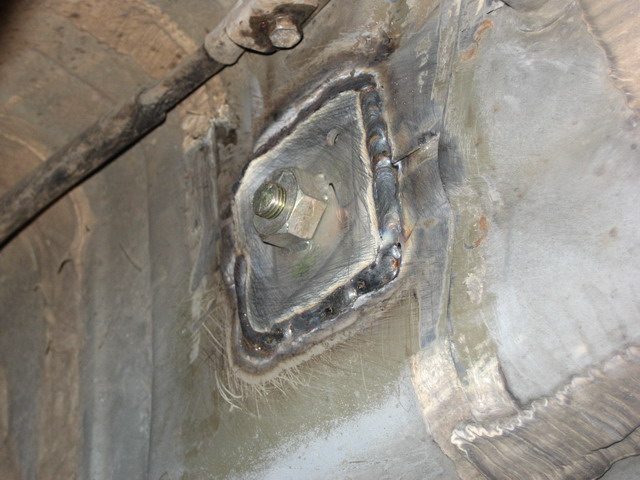
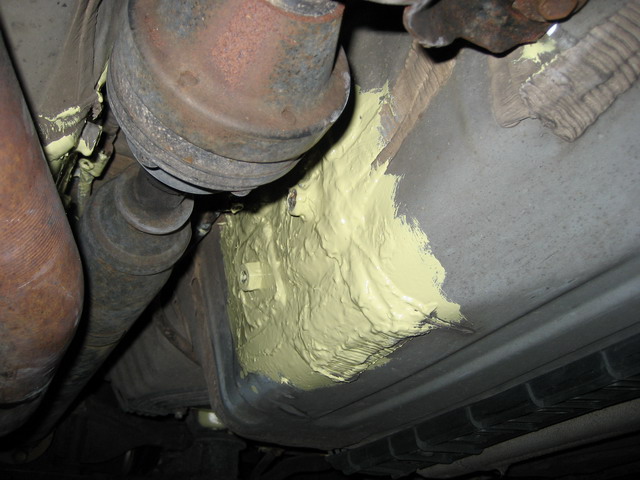
Once the welding was finished and the area cooled, several liberal coatings of seam sealant were applied to the area to prevent any rust etc forming, this was done both inside and outside.
The finished result
The carpets were then replaced seats reinstalled - job done.