ST205 replace fuel pump
Two OH five (Talk | contribs) (Created page with "<p align="center"><u><font size="6"><b>HOW TO - REPLACE THE FUEL PUMP ON AN ST205</b></font></u></p> <p>Submitted by - [http://www.gt4dc.co.uk/forum/profile.php?mode=viewprofile...") |
Two OH five (Talk | contribs) |
||
| Line 1: | Line 1: | ||
| − | + | [[Category:Maintenance|Fule pump]] | |
<p>Submitted by - | <p>Submitted by - | ||
[http://www.gt4dc.co.uk/forum/profile.php?mode=viewprofile&u=138 Gary]</p> | [http://www.gt4dc.co.uk/forum/profile.php?mode=viewprofile&u=138 Gary]</p> | ||
<p align="center"><font color="#FF0000">** This article has pictures from the ST205, but the procedure is similar for all the | <p align="center"><font color="#FF0000">** This article has pictures from the ST205, but the procedure is similar for all the | ||
GT4s **</font></p> | GT4s **</font></p> | ||
| − | + | =Disclaimer= | |
<p>This article is intended as a helpful guide and shows how I replaced the fuel pump. If you are in any doubt, or not | <p>This article is intended as a helpful guide and shows how I replaced the fuel pump. If you are in any doubt, or not | ||
qualified, do not undertake this maintenance, consult a qualified mechanic. The fuel pump is an important vehicle component, failure to change this in accordance with the relevant manufacturers and/or procedures and/or instructions can lead to severe damage or injury. The author or the GT4 Drivers Club can not be held responsible for any loss or damage resulting from use of this article.</p> | qualified, do not undertake this maintenance, consult a qualified mechanic. The fuel pump is an important vehicle component, failure to change this in accordance with the relevant manufacturers and/or procedures and/or instructions can lead to severe damage or injury. The author or the GT4 Drivers Club can not be held responsible for any loss or damage resulting from use of this article.</p> | ||
| − | + | =Safety= | |
<p>When working on a car always use the appropriate safety equipment, chock the wheels to prevent the vehicle from moving. When working underneath a raised vehicle always use axle stands.</p> | <p>When working on a car always use the appropriate safety equipment, chock the wheels to prevent the vehicle from moving. When working underneath a raised vehicle always use axle stands.</p> | ||
<p><font size="4"><b>Special Precautions</b></font></p> | <p><font size="4"><b>Special Precautions</b></font></p> | ||
| Line 13: | Line 13: | ||
or sources of ignition are present close by. It is wise to have a decent sized | or sources of ignition are present close by. It is wise to have a decent sized | ||
foam or dry powder fire extinguisher on hand as well.</p> | foam or dry powder fire extinguisher on hand as well.</p> | ||
| − | + | =Procedure= | |
<p> | <p> | ||
<div align="center"> | <div align="center"> | ||
| Line 22: | Line 22: | ||
</tr> | </tr> | ||
<tr> | <tr> | ||
| − | <td> | + | <td>[[File:st205_fuelpump_06.jpg|thumb]]</td> |
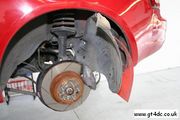
<td>Remove fuel filler / inner arch guard</td> | <td>Remove fuel filler / inner arch guard</td> | ||
</tr> | </tr> | ||
<tr> | <tr> | ||
| − | <td> | + | <td>[[File:st205_fuelpump_01.jpg|thumb]]</td> |
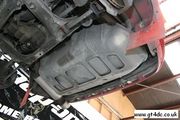
<td>... then remove the fuel tank cover. 6 bolts and one panel clip IIRC</td> | <td>... then remove the fuel tank cover. 6 bolts and one panel clip IIRC</td> | ||
</tr> | </tr> | ||
<tr> | <tr> | ||
| − | <td> | + | <td>[[File:st205_fuelpump_07.jpg|thumb]]</td> |
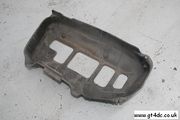
<td>The removed cover</td> | <td>The removed cover</td> | ||
</tr> | </tr> | ||
<tr> | <tr> | ||
| − | <td> | + | <td>[[File:st205_fuelpump_08.jpg|thumb]]</td> |
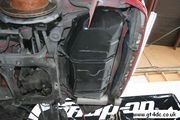
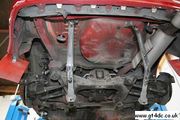
<td>Which allows full access to the tank</td> | <td>Which allows full access to the tank</td> | ||
</tr> | </tr> | ||
<tr> | <tr> | ||
| − | <td> | + | <td>[[File:st205_fuelpump_02.jpg|thumb]]</td> |
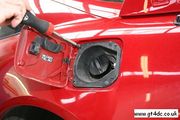
<td>Remove the 4 screws holding the filler flap in place</td> | <td>Remove the 4 screws holding the filler flap in place</td> | ||
</tr> | </tr> | ||
<tr> | <tr> | ||
| − | <td> | + | <td>[[File:st205_fuelpump_03.jpg|thumb]]</td> |
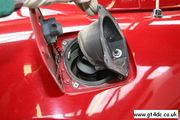
<td>.... and simply carefully pull the assembly to one side</td> | <td>.... and simply carefully pull the assembly to one side</td> | ||
</tr> | </tr> | ||
<tr> | <tr> | ||
| − | <td> | + | <td>[[File:st205_fuelpump_04.jpg|thumb]]</td> |
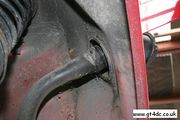
<td>Filler tube is not secured anywhere else so no more clamps etc to worry about there.</td> | <td>Filler tube is not secured anywhere else so no more clamps etc to worry about there.</td> | ||
</tr> | </tr> | ||
<tr> | <tr> | ||
| − | <td> | + | <td>[[File:st205_fuelpump_05.jpg|thumb]]</td> |
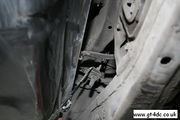
<td>Next, remove hose clamps on the return and breather pipes and remove hoses (have | <td>Next, remove hose clamps on the return and breather pipes and remove hoses (have | ||
a container ready to catch and fuel which may leak out)...</td> | a container ready to catch and fuel which may leak out)...</td> | ||
</tr> | </tr> | ||
<tr> | <tr> | ||
| − | <td> | + | <td>[[File:st205_fuelpump_10.jpg|thumb]]</td> |
<td>You can then undo the fuel feed pipe at the union shown below</td> | <td>You can then undo the fuel feed pipe at the union shown below</td> | ||
</tr> | </tr> | ||
<tr> | <tr> | ||
| − | <td> | + | <td>[[File:st205_fuelpump_09.jpg|thumb]]</td> |
<td>With something below the tank to take the weight when it's freed, undo the nuts on the two 'straps', holding the tank in place...</td> | <td>With something below the tank to take the weight when it's freed, undo the nuts on the two 'straps', holding the tank in place...</td> | ||
</tr> | </tr> | ||
<tr> | <tr> | ||
| − | <td> | + | <td>[[File:st205_fuelpump_11.jpg|thumb]]</td> |
<td>... and lower the tank down...</td> | <td>... and lower the tank down...</td> | ||
</tr> | </tr> | ||
<tr> | <tr> | ||
| − | <td> | + | <td>[[File:st205_fuelpump_12.jpg|thumb]]</td> |
<td>The fuel tank in all its glory...</td> | <td>The fuel tank in all its glory...</td> | ||
</tr> | </tr> | ||
<tr> | <tr> | ||
| − | <td> | + | <td>[[File:st205_fuelpump_14.jpg|thumb]]</td> |
<td>... and the 'hole' left behind...</td> | <td>... and the 'hole' left behind...</td> | ||
</tr> | </tr> | ||
<tr> | <tr> | ||
| − | <td> | + | <td>[[File:st205_fuelpump_13.jpg|thumb]]</td> |
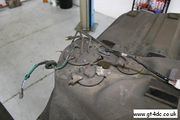
<td>Fuel level sender unit is below the panel closest with the fuel pump 'above'</td> | <td>Fuel level sender unit is below the panel closest with the fuel pump 'above'</td> | ||
</tr> | </tr> | ||
<tr> | <tr> | ||
| − | <td> | + | <td>[[File:st205_fuelpump_15.jpg|thumb]]</td> |
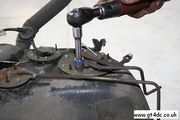
<td>Clean the area surrounding the panel to ensure debris etc doesn't fall inside the tank and remove the securing bolts...</td> | <td>Clean the area surrounding the panel to ensure debris etc doesn't fall inside the tank and remove the securing bolts...</td> | ||
</tr> | </tr> | ||
<tr> | <tr> | ||
| − | <td> | + | <td>[[File:st205_fuelpump_16.jpg|thumb]]</td> |
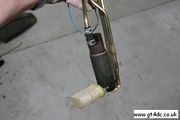
<td>The OE fuel pump...</td> | <td>The OE fuel pump...</td> | ||
</tr> | </tr> | ||
<tr> | <tr> | ||
| − | <td> | + | <td>[[File:st205_fuelpump_17.jpg|thumb]]</td> |
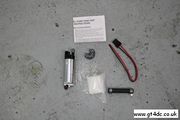
<td>The replacement pump. A 255 l/hr Walbro high flow pump rated to 500bhp</td> | <td>The replacement pump. A 255 l/hr Walbro high flow pump rated to 500bhp</td> | ||
</tr> | </tr> | ||
<tr> | <tr> | ||
| − | <td> | + | <td>[[File:st205_fuelpump_18.jpg|thumb]]</td> |
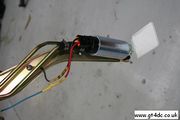
<td>The uprated pump in place. I decided to solder and heat shrink the new +ve and -ve wires in place rather than using the supplied crimps....</td> | <td>The uprated pump in place. I decided to solder and heat shrink the new +ve and -ve wires in place rather than using the supplied crimps....</td> | ||
</tr> | </tr> | ||
| Line 101: | Line 101: | ||
</div> | </div> | ||
<br> | <br> | ||
| − | + | =Other jobs to do at the same time?=<ul> | |
| − | <ul> | + | |
<li>Replace brake discs & pads</li> | <li>Replace brake discs & pads</li> | ||
<li>Replace springs and shocks</li> | <li>Replace springs and shocks</li> | ||
Revision as of 10:12, 24 August 2011
Submitted by - Gary
** This article has pictures from the ST205, but the procedure is similar for all the GT4s **
Disclaimer
This article is intended as a helpful guide and shows how I replaced the fuel pump. If you are in any doubt, or not qualified, do not undertake this maintenance, consult a qualified mechanic. The fuel pump is an important vehicle component, failure to change this in accordance with the relevant manufacturers and/or procedures and/or instructions can lead to severe damage or injury. The author or the GT4 Drivers Club can not be held responsible for any loss or damage resulting from use of this article.
Safety
When working on a car always use the appropriate safety equipment, chock the wheels to prevent the vehicle from moving. When working underneath a raised vehicle always use axle stands.
Special Precautions
Disconnect battery and ensure NO naked flames or sources of ignition are present close by. It is wise to have a decent sized foam or dry powder fire extinguisher on hand as well.
Procedure
| Inside the boot, remove the metal access panel and white plastic conduit cover and disconnect the two multi plugs | |
| Remove fuel filler / inner arch guard | |
| ... then remove the fuel tank cover. 6 bolts and one panel clip IIRC | |
| The removed cover | |
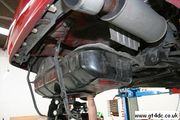
| Which allows full access to the tank | |
| Remove the 4 screws holding the filler flap in place | |
| .... and simply carefully pull the assembly to one side | |
| Filler tube is not secured anywhere else so no more clamps etc to worry about there. | |
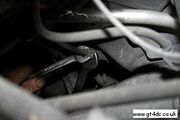
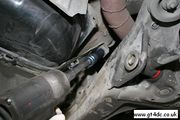
| Next, remove hose clamps on the return and breather pipes and remove hoses (have a container ready to catch and fuel which may leak out)... | |
| You can then undo the fuel feed pipe at the union shown below | |
| With something below the tank to take the weight when it's freed, undo the nuts on the two 'straps', holding the tank in place... | |
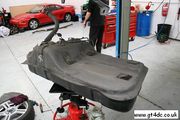
| ... and lower the tank down... | |
| The fuel tank in all its glory... | |
| ... and the 'hole' left behind... | |
| Fuel level sender unit is below the panel closest with the fuel pump 'above' | |
| Clean the area surrounding the panel to ensure debris etc doesn't fall inside the tank and remove the securing bolts... | |
| The OE fuel pump... | |
| The replacement pump. A 255 l/hr Walbro high flow pump rated to 500bhp | |
| The uprated pump in place. I decided to solder and heat shrink the new +ve and -ve wires in place rather than using the supplied crimps.... | |
| Fitment is simply the reverse of above |
- Replace brake discs & pads
- Replace springs and shocks
- Replace CV boots
- Under body seal the rear arch
- Fit rear trailing arm PU bushes
- Fit rear ARB PU bushes
