ST205 Fit Clear Indicators
Submitted by:Darren Railton
Disclaimer
This article is intended as a helpful guide and shows how I replaced my indicators with clear items. If you are in any doubt, or not qualified, do not undertake this maintenance, consult a qualified mechanic. The author or the GT4 Drivers Club can not be held responsible for any loss or damage resulting from use of this article.
Tools
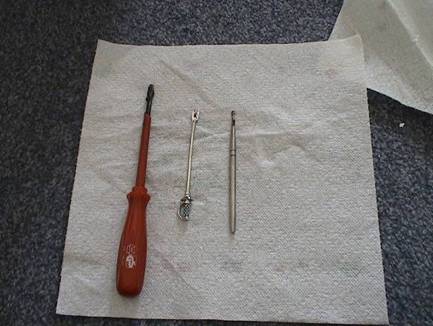
- Philips Screwdriver
- Mini sword tool or craft knife
- Flat blade tool / Flat end screwdriver
Procedure
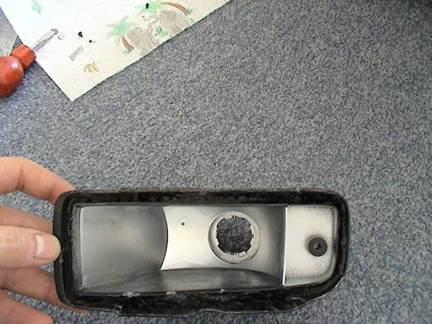
| Remove the indicator unit from the car using a Philips screw driver | |
| Using the flat blade tool (furthest on the right in the above pic) slide
in-between the orange lens & the unit parting them (Note: you can use a bit of force if you warm up the unit in your hands, the black plastic then bends away from the lens) |
|
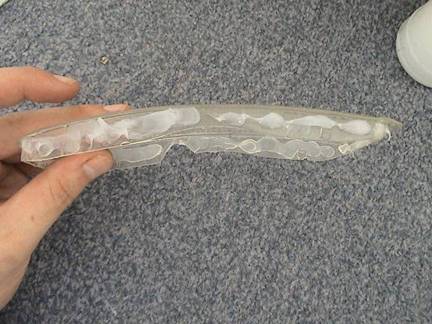
| Scrape away the black glue (more like tar!!!!) from in-between the lens &
the unit, working from one end scrape to the other, going deeper into the unit with every sweep (I found it best to work on the bottom side of the unit, you will not be able to remove the tar from the sides as the unit’s black plastic will not bend) |
|
 |
To get an idea of the amount of tar & the surface size of the orange lens here’s another few pics |
 |
|
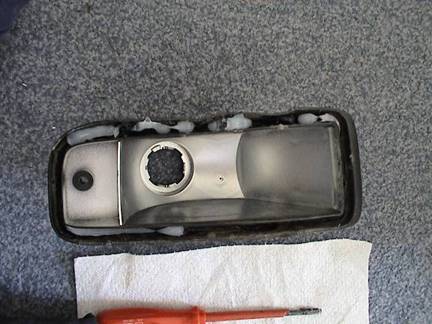
| When you have removed all of the tar from the bottom side, you will then be
able to bend the black unit plastic back gently |
|
 |
Working your way round, you will then be able to separate the lens from the
unit fully |
| Now bend the unit’s black plastic back into its original position | |
 |
Using the glue, place a small amount all of the way round the clear lens & inside the units gully |
 |
NOTE: I was only half way round the unit when I took this picture |
| Fix the clear lens onto the unit & press all sides firmly | |
| Wipe off any excess glue & make sure the 4 catches are located back in the holes of the unit | |
| Fix unit back onto the car & you’re done!!!! |