ST205 Retrofit projector headlights
Two OH five (Talk | contribs) (→Procedure) |
Two OH five (Talk | contribs) (→Procedure) |
||
| Line 21: | Line 21: | ||
</tr> | </tr> | ||
<tr> | <tr> | ||
| − | <td>[projector_lights/01.jpg]</td> | + | <td><span class="plainlinks">[http://www.gt4dc.co.uk/info/howto/projector_lights/01.jpg]</span></td> |
<td>Unplug the connectors from the side lights, dipped lights & main beam lights on all units. | <td>Unplug the connectors from the side lights, dipped lights & main beam lights on all units. | ||
Unscrew the top & bottom bolts that secure the lighting units to the car (Should be 3 bolts per unit). | Unscrew the top & bottom bolts that secure the lighting units to the car (Should be 3 bolts per unit). | ||
Revision as of 19:11, 4 February 2017
Submitted by - Darren Railton
Contents |
Disclaimer
This article is intended as a helpful guide and shows how I fitted projector front headlights. If you are in any doubt, or not qualified, do not undertake this maintenance, consult a qualified mechanic. The author or the GT4 Drivers Club can not be held responsible for any loss or damage resulting from use of this article.
Safety
When working on a car always use the appropriate safety equipment, chock the wheels to prevent the vehicle from moving. When working underneath a raised vehicle always use axle stands.
Tools
You will need the following:
- A decent selection of tools/sockets etc
- A soldering iron
- Wire crimping tool
Procedure
| Remove the front bumper as described in the bumper removal guide. | |
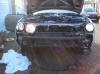
| [1] | Unplug the connectors from the side lights, dipped lights & main beam lights on all units.
Unscrew the top & bottom bolts that secure the lighting units to the car (Should be 3 bolts per unit). Remove the inner (High/main beam) units & replace with the projector units, refit the bolts then the electrical connectors & test |
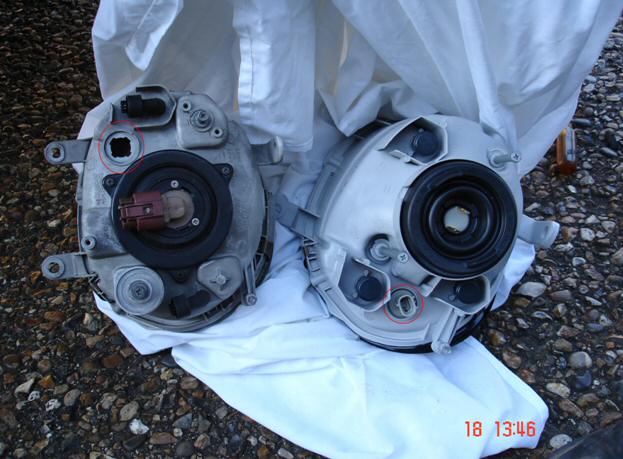 |
Left is a rear comparison picture of the dipped/side light units.
On the left is the old unit you are removing & on the right is the new projector unit. Notice the difference between the 2 units, mainly the dipped bulb connectors & the side light connectors, also note the side lights different locations, on the projector units when fitted the side lights are located in the wings as opposed to the older units where they are located next to the high beam units (Bad design in my opinion as when a side light bulb dies, you most probably have to remove the front bumper & the unit to change them!!) |
 |
The projector dipped light & side light connectors are not compatible with your current wiring loom, you have two options: Option 1 - solder wires to the projector unit connectors or Here is how I set mine up, depending on what option you have opted for some of the following might not apply to you |
 |
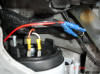
Now solder 2 wires (I chose black & red, but any colour can be used as long as you know what colour is what & that the wires are the correct gauge to handle the current), to the pins(Note: I lodged a small bit of card between the pins to stop any rogue solder from bridging the gap), when done leave the card in place & wrap the connector; wire & card in electrical installation tape (Hence why the 4th side
of the connector was not cut away) Now fit the projector unit to the car, when re-fitted the unit you will need to make sure the location pin on the projector unit fits into the corresponding hole in the wing or the unit will not have a uniformed fit |
 |
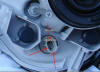
Location hole in car wing for projector unit location pin. |
 |
Now cut off the dipped & side light connection blocks from the wiring loom
Crimp on large spade connectors to both of the dipped beam wires
Crimp on medium spade/bullet connectors to the side light wires, then crimp on the corresponding spade/bullet connectors to the newly solder side light wires |
 |
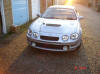
Now test all lights to make sure there are no problems & all is working
Now do the same for the other side using the same procedure, test, then refit the bumper using the reverse procedure for bumper removal |
 |
Depending on seized nuts & bolts the whole job should take no more then 4 hours for the amateur mechanic |
![[1]](http://www.gt4dc.co.uk/info/howto/projector_lights/01.jpg)